Raspberry Pi Remote Educator's Workstation
|
|
1.1.0 - The Premise
My partner is an accomplished Elementary School educator. But she's by no means an ordinary educator: She teaches in a Self-Contained M.D. (Multiple Disability) Classroom of students in grades K - 2. Her students are also far from your ordinary students. In addition intellectual deficiencies, many of her students also come from economically challenged homes; some don't even have homes. That's because she works in an economically challenged inner city School District in the northeastern United States. As for myself? I don't even hold a candle to her. But I have several decades of highly diversified IT experience under my belt, including some with the Raspberry Pi. Thus, I broached the notion of her having one of her own, as she didn't have a computer herself. Instead, she would use the one in her classroom exclusively, which would sometimes be impractical.
A bit of show-and-tell led to a test drive, and finally to her very own Raspberry Pi. It was built around a Raspberry Pi 3B+ running Ubuntu-MATE instead of Raspberry Pi OS, customized to meet some very specific accessibility requirements. She used this to carry out ancillary, work-related tasks on the web based platforms her School District employs; these barely taxed the machine.
Fast forward to March, 2020: The Covid-19 Pandemic forced the
School District to close. Their original plan was to close through
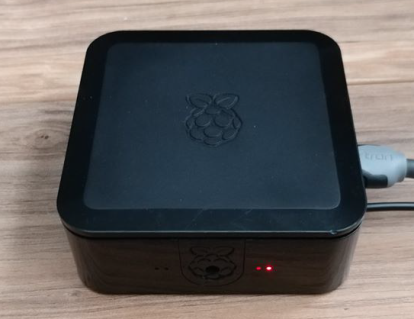
Fig. 1: Raspberry Pi 3B+
(Click to enlarge)
Easter break, and then reopen. As a result, they added a few more
Web Platforms and Zoom Conferencing. Once it became apparent that
the closure would be a protracted one, the District added Google
Chrome, Google Office, and Google Classroom. The list of requisite
platforms kept growing, and the Pi's began having a hard time
keeping up. Its 1 GB of RAM was not enough, requiring and led to a
system upgrade.
A 4 GB Raspberry Pi 4B kit was selected for this upgrade because it included everything and addressed the power and video differences with earlier Pi models. There were a number of substantial changes to contend with as well, including a switch to an interim release of stock Ubuntu Linux because Ubuntu-MATE didn't work on the 4B. Except for Zoom, which isn't directly supported on the Pi, everything worked better than anticipated. My partner finished the academic year with no difficulties.
Once the academic year ended, I intended to upgrade Ubuntu to the Long Term Support (LTS) release. However, the release raised a number of issues that could not be resolved and the Pi is still running the interim release. Except for a lack of core updates, this is not an issue.
On the upside, I learned of a way to run Zoom on the 4B shortly after the 2020-2021 academic year began. But with just one Pi 4 in the house, and no real opportunity to spend "quality time" with it, exploring this alternative has to wait until I could get another. This document, along with a healthy supply of aspirin, chronicles the project.
1.2.0 - The Platform1.2.1 - Raspberry Pi
There are three main Raspberry Pi models, each with variants or families:
- Model Zero - The low price may be tempting, but it isn't powerful enough for this implementation.
- Model A - Hardware limitations make it unsuitable for this implementation.
- Model B - Only the version 3 and version 4 families are suitable for this implementation.
- Compute - An industrial model that may work in principle, but not necessarily in practice.
- Pi 400 - A Raspberry Pi with a keyboard integrated into a compact unit.
Version 3 of the Model B (3B and 3B+) has 1 GB RAM, while version 4 of the Model B (4B) can be had with 2, 4, and 8 GB RAM. While 1 GB models are adequate for implementations that do not require a lot of resources, those that are should use the 4B with 4 GB RAM or more. The new Pi 400 is 4B with a redesigned mainboard and should work just as well.
1.2.2 - Operating SystemLinux is the primary Operating System (OS) for the Raspberry Pi. However, it can also run others that have been ported to its architecture. On the Linux side there are several distributions to choose from. The differences are mainly the default Graphical User Intreface (GUI or Desktop), included applications, look-and-feel aspects, application packaging, and software delivery systems. Everything else is pretty much identical. Unless special requirements are involved, choosing a distribution can is mostly based on personal preferences.
One of the most popular distributions is Debian, and many other distributions are built around it, including most of the ones that run on the Raspberry Pi. This includes Raspberry Pi OS (RPiOS), formerly known as Raspbian, and Ubuntu.
While RPiOS will be sufficient for most users, there will be instances where Ubuntu will be a better choice. However, Ubuntu's default desktop is not traditional, which could be an obstacle for some.
A good alternative in such cases is Ubuntu-MATE, which fuses Ubuntu to the MATE Desktop to provide a traditional desktop. It also includes some of the Raspberry Pi-specific tools from RasPi OS.
Ubuntu itself is available in two editions: Workstation Server. The difference is that the Workstation edition does not include packages that are found in the Server edition. However, those packages can be installed as needed. The MATE Desktop, as well as the aforementioned Pi-specific tools, can be installed as standalone packages.
1.3.0 - The Project1.3.1 - Required Components
- Raspberry Pi - This can be a Raspberry Pi 3B, Pi 3B+, Pi 4B, or Pi 400. While any of these will work, a Pi 4B or Pi 400 is preferrable.
- Enclosure - These come in a variety of styles and prices. To some extent it makes little difference which one is selected, however a case with either active cooling (i.e. fan) or passive cooling is always best; some cases provide both. A self-adhesive heat sink kit is a good idea for certain active cooling cases. Some cases also have a space for a small (7" - 12") panel or touch screen displays. The choice is yours!
- Power supply (PSU) - A PSU delivering a minimum of 3 amps is required. The end of the cable must have a MicroUSB tip (3B/3B+) or a USB-C tip (Pi4/Pi 400). An official PSU is best, but a Pi-certified one will also work. Many of these have a separate power block and cable, and some also have a power switch built into the cable. A switch is most useful because except for the Pi 400, the Pi must be unplugged to physically turn it off.
- Keyboard and mouse - Most wired and wireless USB keyboards, mice, trackpads, trackballs will work. This is good way to reuse ones that may be laying about gathering dust.
- Video cable - The Raspberry Pi has either one conventional HDMI port (3B/3B+) or two Micro-HDMI ports (4B/Pi 400). Any cable with the appropriate ends will work.
- Display - This can be any computer monitor or TV with an available HDMI port, or if the selected case supports it, a display panel or touch screen.
- Media - The Raspberry Pi uses a MicroSD card as a mass storage device by default. Cards must be Class 10 and have a capacity of 16 GB to 512 GB. Name brand cards are generally more reliable, though some off-brand cards work just as well. The Raspberry Pi 4B and Pi 400 can be reconfigured to boot from external devices such as Solid State Drives (SSD), Hard Drives (HDD), and Flash Drives. Additional Supplemental storage devices can be attached to the Raspberry Pi just like with any other computer.
- Operating System - RasPi OS is the default OS for the Raspberry Pi, but not the only one that will work for this project. The choice is a mostly a personal one.
There are kits available online and in stores which include most, if not all the aforementioned components. It is also possible to acquire the components individually.
If videoconferencing applications will be used, a webcam will be required as well. Most webcams will work, though there are a few exceptions.
Printers can be added locally with a direct connection or as a remote connection as a networked printer. Other devices, such as scanners can be added similarly.
1.3.2 - Reference BuildThe system described in this document was built using a kit from LABISTS, a company specializing in Raspberry Pi kits and "Maker" oriented devices. It consists of:
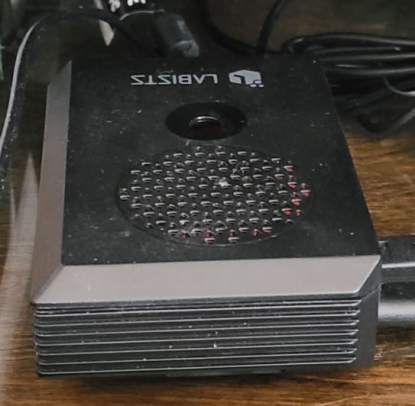
Fig. 2: LABISTS Raspberry Pi 4B
(Click to enlarge)
- 4 GB Raspberry Pi 4B
- Certified PSU with power switch
- Heat Sink kit
- Pi 4 case with fan
- Two MicroHDMI to HDMI cables
- 32 GB MicroSD card preloaded with RPiOS
- Card reader
- Small screwdriver
A 24" Samsung TV, Microsoft wireless mouse, Logitech wired keyboard, Logitech Webcam, and two networked HP printers round out the hardware configuration.
The machine runs on the Ubuntu Server edition, with the MATE Desktop for as its GUI. Ubuntu-MATE does not support the Pi 4B as of this writing.
1.3.2.1 - Addressing Special NeedsMy partner requires a very specific configuration in order for her to use a computer, regardless of the OS. Linux has no problem with accessibility, but the degree and ease of configuration varies by distribution. On the PC side there are many to choose from, but there are fewer on Raspberry Pi.
Given her needs and the ease of configuration, the 3B+ ran Ubuntu-MATE. However, Ubuntu-MATE does not offer a release that runs on the 4B yet. But since MATE can be installed on stock Ubuntu, and it does run on the 4B, the solution was obvious. I would have used RasPi OS, but it isn't easy to customize, especially the finer accessibility elements that she requires. However, Ubuntu with MATE and Ubuntu-MATE make that configuration easy. That it is a cinch to configure the desktop's look and feel to be 95% identical to the one my partner uses in school is just icing on the cake.
TopIt goes without saying that the MicroSD card must be prepared before anything can happen. This document assumes you know how to do that part.
2.1.0 - CaveatsI encountered a few glitches while trying to boot the Pi 4B for the first time, and had to spend some time resolving them: I'm a creature of habit and fallible, so my edits were going into config.txt. My understanding was that, beyond the potential volatility of the file, it shouldn't have mattered; it did. When the same fixes went into usercfg.txt, the fixes were applied.
Because there was no video signal, I had to enable hdmi_safe=1 to produce a video signal (likely because I used a TV. The correct group and mode had to be set as well, but this isn't always necessary (it wasn't with the 3B+) and varies by monitor.
I followed advice on the matter and also added parameters for overclocking the Pi. However, a good cooling mechanism is mandatory for doing so. Traditional self-adhesive heat sinks such as those included in many kits provide some cooling, but I wouldn't overclock with them. By adding a fan, I have found 1.8 GHz to be the maximum safe limit. But to overclock at the recommended/maximum 2 GHz, a comprehensive cooling solution is essential. One of the Argon One cases from Argon Forty, for example). With the fan that came in the kit, I found 1.8 GHz to be a safe limit.
Wireless networking does not work on the initial boot of Ubuntu Server 19.10 and it cannot be set up manually during startup. The initial setup will therefore require a working Ethernet connection, and it sets up automatically at boot time.
2.2.0 - Installing UbuntuThe initial username and password is ubuntu. You must wait for the system settle and stop printing messages to the screen to log in successfully; loging in prematurely generates errors. The password must be changed immediately after this login.
The Ubuntu image comes with all the basics for running the system in-place, albeit in console mode. This is the best time to add any other applications, tools, and/or utilities that may be required. I strongly recommend:
-
zram, which can improve the Raspberry Pi's
performance by setting up a swap partition in RAM.
» Install with sudo apt install zram-config -
net-tools, a collection of command-line
network control utilities useful for troubleshooting.
» Install with sudo apt install net-tools -
ubuntu-mate-desktop, the MATE Desktop
itself.
» Install with sudo apt install ubuntu-mate-desktop
The Desktop takes longest to install and will ask you which Display Manager (DM) it should use: gdm3 or lightdm. Except for this prompt, the installation runs unattended. The choice of DM is usually unimportant; both do the same thing. The only significant user-facing difference is the look of the lock screen. For a Windows-like lock screen experience, select lightdm.
2.2.1 - Adding The Raspberry Pi ToolsTo install the Raspberry Pi-specific tools from RasPi OS that can be added to the system, the appropriate repository must be added and reconfigured manually:
- Add the repository with sudo add-apt-repository ppa:ubuntu-raspi2/ppa
- Change the references in /etc/apt/sources.list.d/ubuntu-raspi2-ppa-eoan.list from eoan to bionic
-
sudo apt update
Although sudo apt update runs automatically after sudo add-apt-repository, it must be run again after the repository database update to synchronize the package library.
- sudo apt install libraspberrypi-bin
- sudo ln -s /usr /opt/vc
MATE Software Boutique is, for all intents, an "app store" delivering a selection of applications that have been configured to integrate into MATE Desktop's layout and look. Applications can be added from other sources, but while they will work properly, the visual elements might be their own.
For some reason, Software Boutique will not run unless the MATE Welcome package is also installed; this package otherwise useless. Both install using the snap utility:
- sudo snap install software-boutique --classic
- sudo snap install ubuntu-mate-welcome --classic
Once all the basics are installed, the system must be updated to ensure all the installed packages are up to date. This is done with sudo apt upgrade. After this completes, the system should be restarted to apply all pending changes and to start the GUI for the first time (it comes up automatically).
Once logged into the desktop, the basic configuration can be completed by:
- Setting the hostname
- Selecting the time zone
- Setting up wireless networking
Once wireless networking is up and running, the Ethernet cable is no longer required.
There are a few packages that still require installation. These must be installed from the Software Boutique as they are modified to work with the MATE Desktop:
- Pulse Audio
- Codecs Pack
- Chromium Browser
Setting up a printer is a process that varies by the device in question and how it will connect to the system. The setup can be easy, complicated, or somewhere in between.
Some printers will not set up properly without intervention. The easiest solution to the problem is to disable auto-detection capability in the CUPS Print Server if issues arise:
- Open a Terminal window
- Open /etc/cups/cups-browsed.conf in a text editor using admin (sudo) mode
- Enable the BrowseProtocols directive with a value of none
- sudo service cups-browsed restart
- sudo service cups restart
Two networked printers were set up on my partner's system: A monochrome Laser printer, and an MFC Colour printer. Both are Hewlett-Packard (HP) devices sitting on the network, but whereas the MFC has built-in WiFi, the Laser printer only supports Ethernet and thus connects to a switch.
While my HP 8035 Colour printer is directly supported by the Print Server and installed without any hitch, my HP P1606dn Laser printer is not. It requires drivers contained in the HPLIP package. Ubuntu 19.10 only includes the base HPLIP v3.19.6 package; the GUI front end, which is easier to work with, is mysteriously absent. I installed it with sudo apt install hplip-gui.
Unfortunately, HPLIP has several known bugs that have yet to be fixed by HP, but three of them have workarounds or fixes:
-
Bug: The
script cannot authenticate the public PGP/GPG key.
Fix: Use sudo to edit /usr/share/hplip/base/validation.py, and change the keyserver name located on/near line 44 from pgp.mit.edu to pool.sks-keyservers.net. -
Bug: When the script prompts for a
password, authentication fails.
Fix: For some odd reason, the original system password (ubuntu) worked even though it's no longer the root password! I stumbled across this by chance. -
Bug: The
script cannot install the required plug-ins.
Fix: Use sudo ln -s /usr/lib/aarch64-linux-gnu /usr/lib/sane to create a symbolic link.
With everything installed and tested from the administrative end, create all the User accounts and join them joined to the following groups: fax, sudo, audio, video, plugdev, lpadmin, and scanner. Some of these groups will already be selected, but some things may not work if the users are not joined to those groups.
The standard installation ends here.
2.4.1 - Additional CustomizationWith the user account established, I applied the "eye candy" and pointers. Given my partner's needs, it was important to keep things as familiar-looking as possible. To that end, I applied:
- a theme derived from Windows 7 for familiarity
- an enlarged Pointer theme
- modified the system Menu Bar and desktop to mimic Windows 7
- configured the system functions she uses and/or needs most
- configured the applications she uses the most, including Chromium
All of these customizations are specific to my partner. Each individual's unique circumstances will determine what customizations works best for them. It can be a very time-consuming process that might involve a lot of "A vs. B", instant back-and-forth comparisons to get things just right. RasPi OS comes up very short in this area. Once the customizations were complete, I made a backup of the home directory and put it in a safe place for recovery purposes.
After turning over the system to my partner, we came across several minor issues, and a few non-issues.
3.1.0 - Load Failure MessagesAs the Linux boot sequence progresses, status messages indicating the progress of the startup are displayed on the screen. One of these status messages reads:
Most users will see this message early in the sequence. It doesn't look pretty, but is totally harmless. The message is caused by an attempt to load three modules for use by the Print Server. They are called by default and can be disabled unless otherwise required, by:
- Editing /etc/modules-load.d/cups-filters.conf in admin mode.
- Commenting out the line for lp
- Commenting out the line for ppdev
- Commenting out the line for parport_pc
Remote education requires a webcam for instruction and virtual conferencing purposes. Linux recognizes the Logitech C510 USB webcam and integrates it automatically. However, any attempt to use it causes the keyboard, mouse, and video image to freeze in various combinations.
The issue is averted by issuing the command sudo setpci -s 01:00.0 0xD4.B=0x41 evey time the user signs in. Expecting a user to do this clumsy, but it can be made to run when a user logs in. To avoid being prompted for a password every time, an entry must be added to /etc/sudoers from a Terminal window:
- sudo visudo
-
Go to the bottom of the file and insert the following line
for each user, replacing <username> with the
actual username:
- <username> ALL=NOPASSWD: /usr/bin/setpci
Depending on the application involved and other factors, audio can become choppy, stutter, or even sound like a Dalek in respiratory distress. This is due to how audio modules, PulseAudio in this case, are loaded.
Correcting the issue requires changing an entry in the PulseAudio configuration file. To do so:
- Edit /etc/pulse/default.pa in admin mode
- Locate the directive load-module module-udev-detect
- Change the directive to load-module module-udev-detect tsched=0
- Save the edit and reboot to apply the changes
3.4.1 - Adobe Flash Support
Forget whatever anyone might say or think about Adobe Flash, let alone what everyone knows about it, or its fate (Adobe will discontinue Flash at the end of 2020). There are many resources in School curricula that are built with Flash, potentially making it mandatory.
Adobe provides a Flash plug-in for i386 and amd64 architectures, not the armhf/aarch64 architecture used by the Raspberry Pi. For that architecture, Flash support is provided by a plug-in called PepperFlash. If the system is running RasPi OS, the PepperFlash plug-in will already be installed and work as intended. However, it is not in the Ubuntu distribution and must be installed separately. That process is very tedious and might not even work. PepperFlash appears abandoned; its last update was around 2012. The alternative, a plug-in called gnash, is definitely abandoned and will not work.
3.4.2 - Pointer ConsistencyThere is a challenge involving Chromium, as it relates to with pointer appearance. It has a minimal impact in a conventional setup, but when accessibility settings enter the equation, the impact could well be significant.
In Ubuntu-MATE 18.04, the Pointers theme remains consistent across all applications. However, in Ubuntu 19.10, Chromium falls back to the fallback theme corresponding to the Display Manager! These are small black pointers that can be very hard to see in many instances.
So what's different? Two things stand out:
- Instead of being a conventional package, Chromium is now a SNAP package.
- Ubuntu 19.10 uses a newer version of the QT Framework
QT release 4 (QT4) includes a MATE Control Center applet that includes an option to force-apply QT4 objects on applications that do not support the QT framework, thereby providing a consistent look and feel. This applet does not exist in either Ubuntu 19.10 or MATE, which ships with QT release 5 (QT5). Chromium does not employ the QT framework, so the pointer reverts to the fallback (Display Manager) pointers whenever they overlay the Chromium window.
3.5.0 - Zoom Cloud ConferencingWhile Zoom does support Linux, the company only supports the i386 and amd64 architectures, not the armhf/aarch64 architecture used by the Raspberry Pi. The web-based version of Zoom works after a fashion, but starting/joining a meeting requires a few gyrations:
- Access the Zoom meeting in a web browser
- Cancel the xdg-open dialog
- Click the alternate launch link to bring up, and then cancel, the xdg-open dialog
- Click Open in Browser
- Select Use Computer Audio
- Wait for the Join button to light up
- Click Join to enter the meeting
- Enable/disable the audio and video states as desired
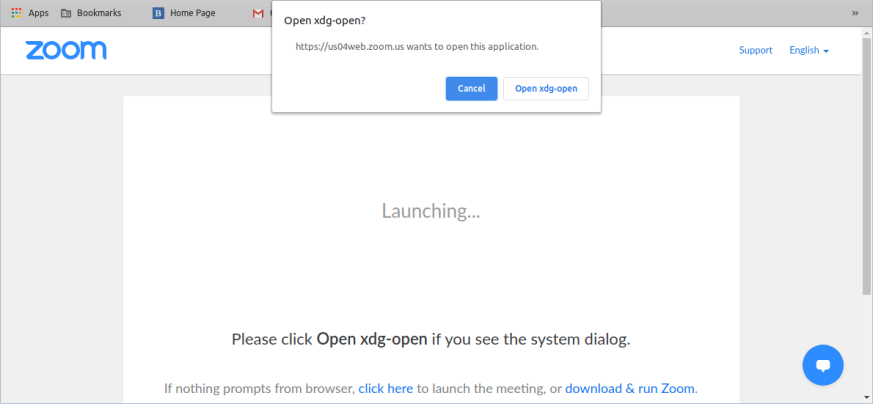
Fig. 3: Zoom - xdg-open
(Click to enlarge)
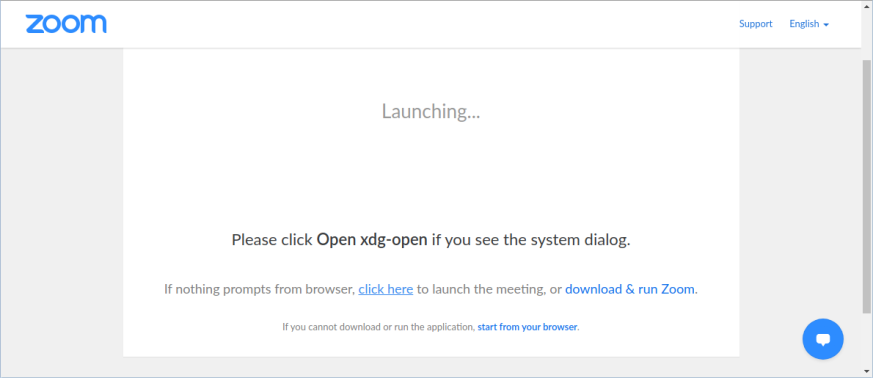
Fig. 4: Zoom - Browser Link
(Click to enlarge)
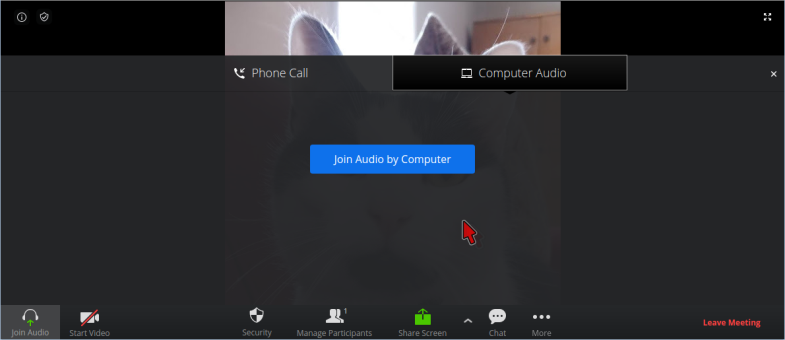
Fig. 5: Zoom - Join Button
(Click to enlarge)
Fig. 6: Zoom - Active Session
(Click to enlarge)
The browser session method tends to be unstable at times and is crash-prone for some reason. If the session crashes, refresh the browser tab and repeat the above steps to re-join.
Top4.1.0 - Final Thoughts
My partner has been using the Raspberry Pi 4B since her Spring Break ended in late April, 2020. There is a night and day difference between it and the Pi 3B+ she used before that. There is no lag, and the machine has yet to lock up; something the 3B+ did a lot toward the end due to resource starvation.
The issues discussed under Troubleshooting are on hold for the following reasons:
- Rumor has it that the School District is dropping all Flash content materials from the curriculum. The matter will be moot if this comes to pass.
- The Chromium Pointers issue may resolve itself with a future release of Ubuntu and/or Ubuntu-MATE. This is a wait-and-see matter at this time.
- The Zoom Cloud Conferencing issue is out of my hands. The only way it can go away will be if and when the company releases a build that will run on the Raspberry Pi. There is an open thread requesting a Raspberry Pi Build in the Zoom Support Forums, so with enough clamor it might just happen.
4.2.1 - References
- Video: Install Ubuntu MATE On The Raspberry Pi 4!
- Video: Ubuntu Mate 19.10 Raspberry Pi 4
- Ubuntu Wiki: Installing Raspberry Pi Packages in Ubuntu
- Raspberry Pi Forums: Kernel Module Load Failures
- Raspberry Pi Forums: Running Zoom video conferencing client on the Pi
- Raspberry Pi 3B+
- Debian Linux
- Raspberry Pi OS Download
- Ubuntu Linux
- Ubuntu-MATE Distribution
- MATE Desktop
- LABISTS, Inc.
- Ubuntu Linux Download
- Argon Forty
- Kubuntu Distribution
- Lubuntu Distribution
- Xubuntu Distribution
- Pulse Audio
- Chromium Browser
- HP 8035 Printer
- HP P1606dn Printer
- HPLIP Printer Plug-in
- HPLIP PGP/GPG Issue
- HPLIP Plug-in Installation Issues (see Posts Posts 4 and 7)
- Audio Quality Issues (a.k.a. Dalek takeover)
- Adobe Flash
- QT Framework
- Zoom Conferencing
- Request For a Raspberry Pi Zoom Build